Showing posts with label blotter art. Show all posts

Tuesday, July 16, 2013

Kid Painted Quilt - Blotter Art

I managed to finish the quilt that Bunny #1 painted the blocks for. To recap this is how she painted each block herself. 


When I had finished the quilt I prepared her bed and took her upstairs. She was very excited - can you tell? 


The fabric I used is from Michael Miller's Fairy Frost line. I used 1 yard each of Dusty Rose, Orchid, Glitz Petal Pink & Azalea. The material is just perfect for a little girl who loves pink & purple. The glitter & shimmer in the fabrics is just fabulous. If I had endless supplies of cash I would be buying up the whole range. The backing is pink & swirly wide quilt backing.

Remember she wanted fancy pillows? I think they look like butterflies.


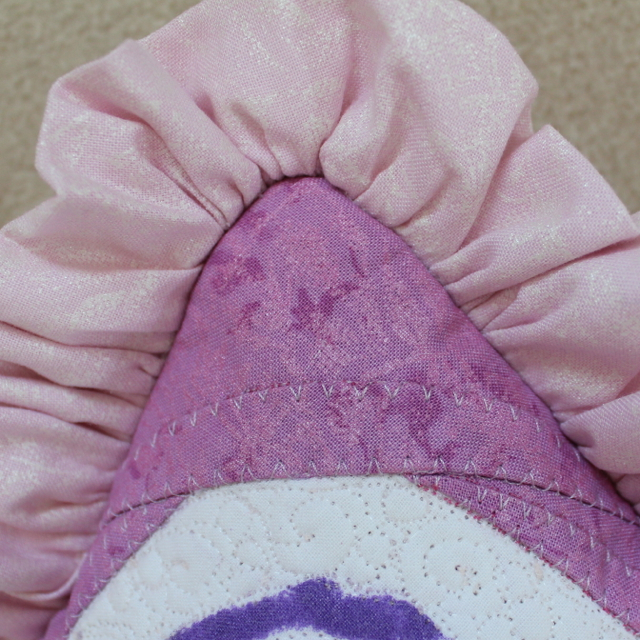
The pillows have a fancy frill & fancy border - I used the same sort of technique used when making a cathedral patchwork block - but I sewed down the curves down. Here you can see the pretty shimmer in the fabrics.

In the center of the quilt I joined two blocks together to make longer mirrored blocks.


In some ways I am quite glad Bunny #1 went to wild with paint - if we hadn't have had to blot up the gloo-globs of paint with a another square of fabric we wouldn't have such symmetry.


I have recently invested in a BSR foot. And I am having a bit of a love hate relationship with it (more hate really.) I am just so glad this quilt is for my daughter and not someone else. I used a flower pattern with a swirl inside as the stippling design. 20 minutes in I knew this was a bad move - but it was too late - I had to push on and finish.


The quilt measures under a technical twin quilt size - but it still fits nicely on her bed.


The little princess was a very happy girl. 


Things I would do differently next time - I would make the fabric squares she painted smaller and I would perhaps try and more complicated design/framing of the blocks. I would also like to make friends with that BSR foot ..........

Our other kid painted fabric projects this summer have included:
Kid painted Quilt #3 - Spraying Paint
Kid painted Quilt #4 - Shaving Foam Paint

***********

Please do not forget about the charity I Spy quilt - we are still looking for scrap fabric donations. 

Friday, July 5, 2013

WIP: Kid Painted Quilt - Blotter Art

We are in the midst of our summer holidays and I'm trying to find activities which involve my kids and that I find interesting - namely creating things! I had this idea to create a series of fabric paintings with my eldest which I would then sew together to make her a quilt that she had co-created.

I have recently invested in a couple of gallons of BioColor and the BioColor Fabric Medium. BioColor does some really cool stuff. But most of all I like it because it is non toxic and the colors are extremely vibrant. It does not however wash out of clothes - in fact it stains badly - so I was quite confident - mixed with the additional fabric medium - it would be a great thing to use for this project. 

She chose her colors - pink and purple. Why does that surprise me? I mixed the following 5 hues. I also added some 'Make it Shimmer' to the dark pink and purple colors.


We are all prepared. Squares (12"x12") of white muslin (I really like the weight and quality of this muslin) on top of waxed paper. The paint is in what Discount School Supply call 'Nancy Bottles'. My girls LOVE squeezing the paint out of them - but gosh can they make a mess with them!


We start to squeeze - our first square is very neat. 


We fold the fabric over and squish. 


Open it up - our first square completed! 


Then we start getting crazy and spreading paint everywhere .... 


... which leads to this.


Squiggles?


Splatty dots? 


There was WAY too much paint being thrown around and the fabric couldn't absorb nearly anywhere enough of the paint. So we changed our strategy. I made an outline to try and contain the spread of paint and once we had folded and splatted we put another square on top of the 'painting' and made a copy.


This worked really really well and gave us two matching copies of each square she made. I also felt having multiples of each 'painting' would be good for making a quilt design.


After reading the instructions (after the painting was over!) I read that the paint had to be left to dry for 5 days - which for an impatient four year old was a daunting wait. I will launder, dry and iron all the squares before putting the quilt together. Bunny #1 is already very proud of her 'blanket. She has also demanded a matching 'fancy pillow' with ruffles .......

Update: You can see how this quilt turned out here http://rachaelrabbit.blogspot.com/2013/07/kid-painted-quilt.html 

Our other kid painted fabric projects this summer have included:
Kid painted Quilt #3 - Spraying Paint
Kid painted Quilt #4 - Shaving Foam Paint