Friday, August 9, 2013

Learning to Free Motion Quilt


I am currently taking some free motion quilting lessons with Teri Lucas. Teri is lovely and she is cheering me on.

Despite the projects I seem to take on these days - I have not been free motion quilting for very long.  Here is my complete history of free motion quilting. And Teri - I'm scared you might be reading this - I really haven't quilted very much at all!

I took my first lesson in 2007 which in truth freaked me out and I didn't go back to it before stippling a small makeup case in 2009.


At the time I was extremely pleased with myself - but I have to admit I had trouble posting this picture at all!

I then began popping out babies and concentrate largely on my knitting skills (I just love to knit!) Any quilts I made I just opted to sew in the ditch or tie. I was still very scared of free motion quilting.

Then in 2012 (yes it took me 3 years to try this again) I took a leap of faith and made a playmat for a cousin and quilted it by stippling.


Then later in 2012 I made a memory quilt for a 90th birthday celebration. This was a monster sized quilt - I must have been crazy to take it on.


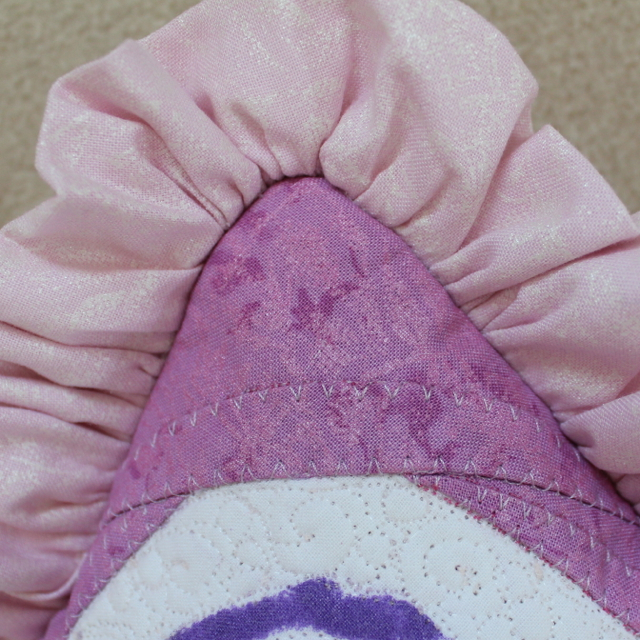
In these 3 widely spaced projects I could already see a vast improvement in my stippling. This year I have completed the following projects.


and our first in a series of Kid Painted Quilts quilted with swirly flowers.

That's it. Not too much experience really. And this was a good post for me to write as it reminds me that I have come a long way with not so much experience. So tomorrow when I sit down to fight with an amazing project I am honored to be working .... I will remind myself. I am getting better - but it takes practice. Hours and Hours of practice .... and I am on a total mission to conquer this free motion quilting!

***********

Please do not forget about the charity I Spy quilt - we are still looking for scrap fabric donations. 

Tuesday, August 6, 2013

Review: The Ultimate Sweater Machine

Have you seen these machines advertised? Have you seen the cost of them?


I've wanted to try a machine knitting for the longest time - but the sheer cost and complexity of one has put me off. After much research and talking to lots of people - I decided to give this machine a chance. My Bernia cost a pretty penny and I haven't regretted any moment of that investment (in fact I would recommend a Bernia to anyone) but I was very worried about throwing away $ on this purchase (a birthday present from my husband.)

It took me about 3hrs to set up and figure this little beast out. If you are considering this machine I would only recommend it if a) you know how to knit b) you are patient and relatively calm and c) machines do not intimate you.

The knit is surprisingly good. Here is the test patch I first made with the yarn they provided in the box.


I have to say - so far it has won me over. It is plastic and it is not finely engineered - but for the $'s it is pretty amazing. Here are my tips ...
  • don't bother with the wax they give you reach straight for the silicone spray
  • keeping the tension on the edges of the hanging knitting is key (invest in some knitting machine weights asap)
  • slower is better - don't rush - check each row for dropped stitches before starting the next- ignore their advertised speed - slower is better
  • don't force the carriage - or press down too hard - you should be able to move it side to side with one hand
  • watch every video on You Tube you can find  BEFORE buying or setting up to learn about its quirks and limitations
  • keeping practicing, breath lots and have chocolate/diet coke on hand
I would say that I am a pretty avid fan of handing knitting. I find the process incredibly peaceful and soothing and I love making big projects and designs that my friends and family look at me as though I am crazy to take on. So why get a machine? I'm so horribly time bound these days with the little kids - I'm desperate to knit again - but I want to spend my time doing the fiddlier bits of cables and corners and all that fun stuff - I want to be able to produce large plain stockinette stitched areas.

I just knitted 60 rows of 130 stitches each in about 40 mins - which is much slower than their advertized rate - but I was being ultra careful.


Stay posted for some projects I have planned with this little machine.

Friday, August 2, 2013

Quilting Batik (well kind of)

I remember doing batik as a young school girl and I wanted to try the wax version for this experiment - but I have very little time available to me, the fact that hot wax and little people didn't seem a good idea - I decided to try Batik-EZ to see how this idea would turn out.


This idea came to me and for the purpose of my experiment I used a coloring page that bunny#1 had got from her ballet class.


I placed a piece of white fabric over my finished design (minorly added & adjusted with a sharpie) and I set to work with my batik-ez tube of goodness.


I used a toothpick dipped in the goop to trace the line. A paint brush was just too thick. The Batik-EZ spreads across the fabric quite a bit.

After I had traced all the lines and left them to dry I used fabric paint (Jacquard Products Textile-Color Exciter Pack) to color in my picture. This paint was so easy to use - it was like water color for fabric - add more water to make lighter colors - I just thought it was a very flexible and easy to use product.

Once the paint had dried I washed & dried the fabric & went to work practicing my free motion quilting with my new BSR foot. We are still not firm friends - but our relationship is slowly getting more friendly.


I used a heart/vine quilting pattern.

My eldest bunny LOVES this so I think I will have to finish it off into a cushion in fabrics to complement her own painted quilt or make her a special bag for her ballet gear.

I also tried a brighter ocean picture out - which was cute too. Beach bag perhaps?


I have way too many ideas for making a full sized quilts in this way.

Tuesday, July 30, 2013

Coffee Filter Butterfly Tree

What we do with this branch we found in the garden never ceases to amaze me. In case you have missed the progression of our year long tree project check out the other trees we have made so far.

Swedish Easter Tree
Valentine Tree
Recycled Cherry Blossom Tree

This idea came to me as I was washing up looking out of the window and looking at butterflies flutter around the garden in the sunshine.


The colors in our butterfly tree are really amazing. 


As you can tell we made a lot of coffee filter butterflies for this tree (over 60!)

We decorated out coffee filters by various methods. The traditional markers & water, dipping the filters in liquid watercolors & glitter. 

 Folded & dipped in liquid water color. 

Water soluble markers & water. 

Dipping in liquid watercolors was by far the preferred method.


We had to hang washing lines all over the kitchen to dry all the filters. We also experimented about how we hung the filters to ensure we got lots of different results. 


Glitter glue added a magical sparkle and prevented the spread of the liquid water colors. Folding coffee filters and hanging them together or on top of each other gave different - but beautiful effects - colors leaking from all angles.


Even my 2 year old bunny enjoyed the activity.


Not very precise - although she really is trying - just look how carefully she is holding that filter. 


Our kitchen towels were soaked but ever so pretty once we had finished.


My eldest wanted to make butterflies with two filters at once. It was a genius idea - giving us some very large and full butterflies.


And we made some dragon flies too. 


You might be wondering what became of all those pretty tissue paper cherry blossoms. Well my girls loved gathering the 'fallen petals' and they are still playing with them. I'm thrilled - this tissue paper has had 3 uses so far - wrapping gifts to pretty tree blossoms to endless games of gathering, grouping and carrying around the pretty posies.


We left our little egg carton caterpillar on the tree - obviously one day he will turn into a butterfly too.


Happy butterfly spotting this summer!


***********

Please do not forget about the charity I Spy quilt - we are still looking for fabric 4"x4"scrap donations. 

Friday, July 26, 2013

WIP: Kid Painted Quilt #2 - Throwing Paint

We enjoyed making the blocks for our first Kid Painted Quilt so much I wanted to do it again but produce the painted fabric for a quilt in a different way. We do quite a lot of 'sensory' play here (I like to just call it just plain messy play!) and as the summer made its way upon us I have become mildly obsessed with some kiddy play orientated blogs. When I saw this idea of throwing paint on Blog Me Mom I knew I would want to do it with the girls but use fabric instead.

For this project I used our of BioColor and the BioColor Fabric Medium. You will be surprised that pink and purple were again chosen - but I also included yellow & red as well. I used a 36"x45" piece of white muslin instead of paper. Again we went with the option of no clothes as this product stains fabric so badly.


Our balls are made from rolled up pieces of scrap towel secured with elastic bands. 


The girls were a bit confused & hesitant at first with their Mummy telling them to throw paint around. We do a lot of painting but 'throwing' the paint around has never ever been encouraged!

Then a few balls were thrown. 


And then it stayed like this for a while until .... 


... paint started flying ...


... everywhere ...


... my youngest was totally entranced by the action but took his job of being in charge of the hose seriously ... 


... and then things got a little silly - being given permission to throw paint - throwing bowls of water on top of the paint seemed only natural ... 


 ... we folded up the fabric ...


... as apparently dancing on it was also necessary!!!


I'm already impatient and mildly intrigued to see how this quilt turns out!

Our other kid painted fabric projects this summer have included:
Kid painted Quilt #3 - Spraying Paint
Kid painted Quilt #4 - Shaving Foam Rainbow Paint

***********

Please do not forget about the charity I Spy quilt - we are still looking for scrap fabric donations. 

Tuesday, July 23, 2013

Charity I-Spy Quilt

One of the problematic things I find about looking at other people's work so much is there are endless projects I come across that I want to make. When I saw this I Spy quilt at Blueberry Patch I knew I wanted to make one. Problem is - I have very few I Spy materials. Cathy (from Blueberry Patch) very kindly offered to send me some scraps to get me started which lit a small light bulb in my head ...

'what if lots of people sent me I Spy scraps 
and then we auctioned the quilt off for charity'

So this is my plan.
  • To make 2 quilts - one boy themed & one girl themed. 
  • The quilts will be bigger than a toddler but under a twin sized quilt. Suitable for either a toddler bed, twin bed or to use as a play mat on the floor or picnic blanket outside.
  • I will accept any donations of any scraps that are suitable for an I Spy blanket. Anyone who donates fabric to the project will be listed on each each post about this project & appropriate link to a blog if applicable.
  • I would like each square to have an identifiable object in them. Here is some fabric I quickly found today. Hopefully you will be able to spot the answers to the following questions:
  1. Can you spy the cow?
  2. Can you spy the green bird?
  3. Can you spy the red ladybugs?
  4. Can you spy the rabbit jumping over the moon?
  5. Can you spy the blue bird? 
  6. Can you spy three rabbits?
NOTE: If your square does not have an easy straight forward I Spy question and answer it might not be included on the front of the quilt but I will include it on the backing.
  • Squares should be cut exactly 4" x 4" with a ruler & rotary cutter. If you do not have a rotary cutter please cut your squares large and I will trim them down.
  • I would like to include a little list of everything that is on the quilt to help the new owners play I Spy with the quilt.
  • The quilts will be finished and auctioned off after Thanksgiving 2013. They will be packed & posted to the winners in December - just in time for Christmas. 
Please e-mail me at rachael_dorr@yahoo.com to be involved in this project and please help me spread the word.

Tuesday, July 16, 2013

Kid Painted Quilt - Blotter Art

I managed to finish the quilt that Bunny #1 painted the blocks for. To recap this is how she painted each block herself. 


When I had finished the quilt I prepared her bed and took her upstairs. She was very excited - can you tell? 


The fabric I used is from Michael Miller's Fairy Frost line. I used 1 yard each of Dusty Rose, Orchid, Glitz Petal Pink & Azalea. The material is just perfect for a little girl who loves pink & purple. The glitter & shimmer in the fabrics is just fabulous. If I had endless supplies of cash I would be buying up the whole range. The backing is pink & swirly wide quilt backing.

Remember she wanted fancy pillows? I think they look like butterflies.


The pillows have a fancy frill & fancy border - I used the same sort of technique used when making a cathedral patchwork block - but I sewed down the curves down. Here you can see the pretty shimmer in the fabrics.


In the center of the quilt I joined two blocks together to make longer mirrored blocks.


In some ways I am quite glad Bunny #1 went to wild with paint - if we hadn't have had to blot up the gloo-globs of paint with a another square of fabric we wouldn't have such symmetry.


I have recently invested in a BSR foot. And I am having a bit of a love hate relationship with it (more hate really.) I am just so glad this quilt is for my daughter and not someone else. I used a flower pattern with a swirl inside as the stippling design. 20 minutes in I knew this was a bad move - but it was too late - I had to push on and finish.


The quilt measures under a technical twin quilt size - but it still fits nicely on her bed.


The little princess was a very happy girl. 


Things I would do differently next time - I would make the fabric squares she painted smaller and I would perhaps try and more complicated design/framing of the blocks. I would also like to make friends with that BSR foot ..........

Our other kid painted fabric projects this summer have included:
Kid painted Quilt #3 - Spraying Paint
Kid painted Quilt #4 - Shaving Foam Paint

***********

Please do not forget about the charity I Spy quilt - we are still looking for scrap fabric donations.